mod_pagespeed Module for Faster Page Load on VPS Servers
mod_pagespeed is an Apache module from Google that rewrites web pages as Apache serves them, which cuts latency and bandwidth and helps pages load faster. On a HostGator VPS or Dedicated server that runs cPanel and WHM, you can install it yourself from EasyApache 4 in WHM. It takes a few clicks, and you don’t have to edit any Apache files afterward.
This article covers the install steps, a quick way to confirm the module is running, and what to check if a domain also uses Cloudflare.
What You Need Before Installing mod_pagespeed
You need three things in place before you start:
- Root access to WHM. Only the root user can add Apache modules.
- EasyApache 4. mod_pagespeed ships as an EasyApache 4 module, and EasyApache 4 is what current cPanel and WHM servers use.
- mod_deflate. It’s already installed on a standard EasyApache 4 server, so there’s nothing to compile first.
How to Install mod_pagespeed in WHM
- Log in to your Customer Portal.
- From the left-hand menu, navigate to Hosting and select My Plans.
- Click the WHM button.
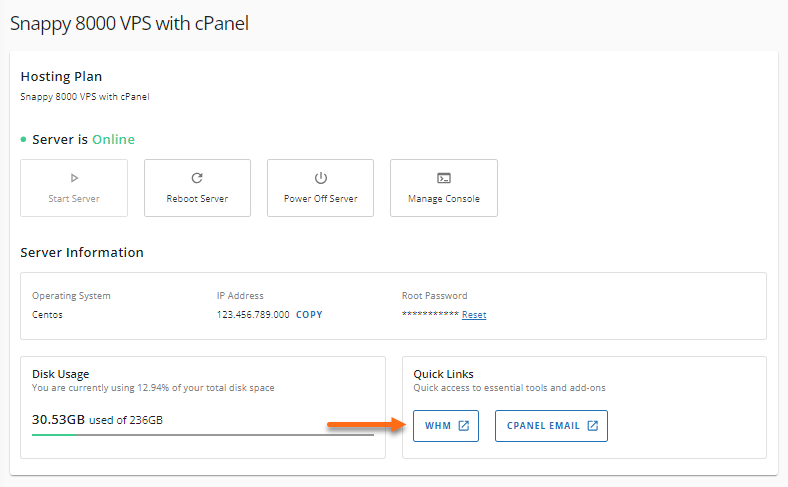
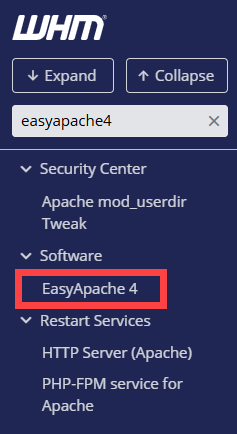
- In the search box at the top of the left menu, type EasyApache 4, then click EasyApache 4 under Software.
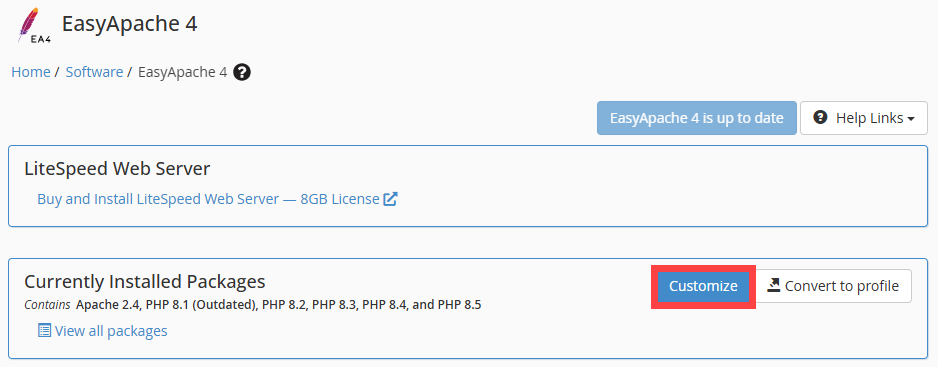
- In the Currently Installed Packages section, click Customize.
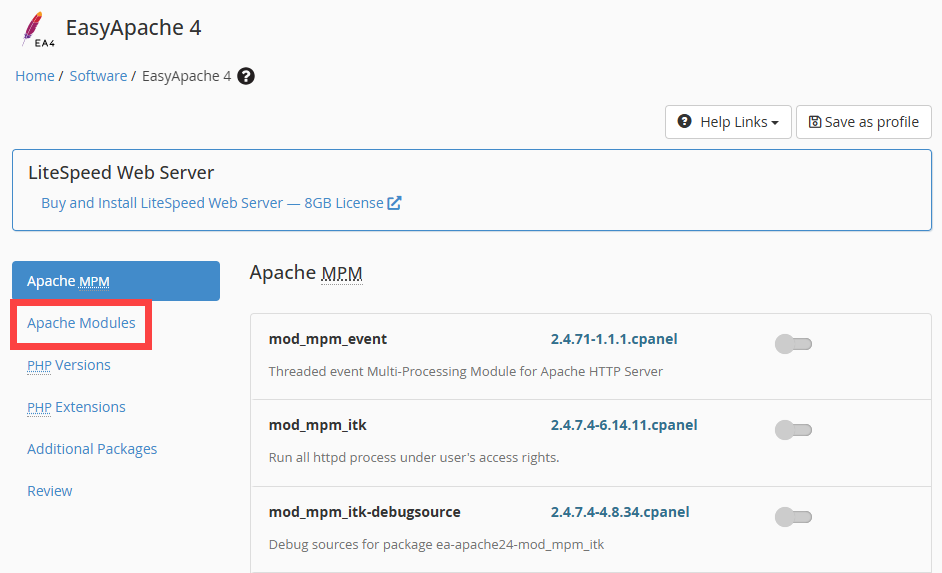
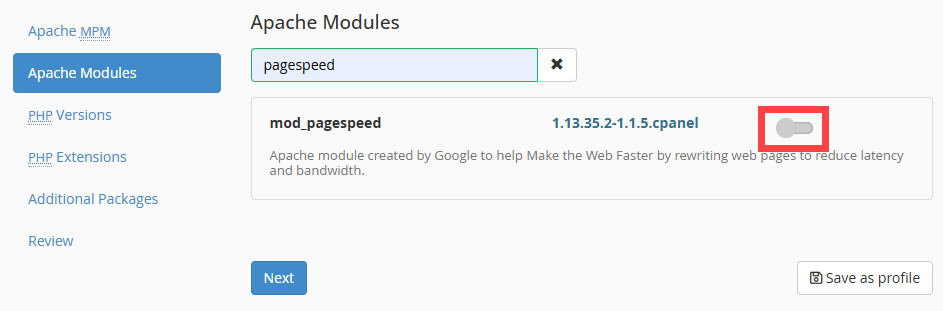
- In the left menu, click Apache Modules.
- In the Search box, type
pagespeed. - Turn on the toggle next to mod_pagespeed.
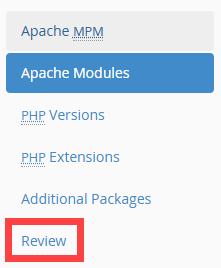
- In the left menu, click Review. Confirm that mod_pagespeed appears in the list of packages to install.
- Click Provision.

- Wait for the process to finish. When you see The provision process is complete., click Done.

How to Check That mod_pagespeed Is Running
The quickest way to check is the terminal built into WHM, so you don’t need a separate SSH client.
- In WHM, type Terminal in the search box at the top of the left menu, then click Terminal under Server Configuration.
- If a warning notice appears, click I understand and want to proceed.
- In the terminal window, run this command to see whether Apache loaded the module:
httpd -M | grep pagespeed
If it did, you’ll get this back:
pagespeed_module (shared)
To confirm that pages are actually being processed, run the next command in the same terminal window and look at the response headers. Swap yourdomain.com for a domain hosted on the server:
curl -s -D - -o /dev/null -H "Host: yourdomain.com" http://127.0.0.1/ | grep -i pagespeed
A working install adds an X-Mod-Pagespeed header to the response. Your version number may be different:
X-Mod-Pagespeed: 1.13.35.2-0
Which Files mod_pagespeed Adds to Your Server
The EasyApache 4 package adds one configuration file that loads the module and switches it on, plus the module files and a cache directory. That’s why no manual Apache edits are needed.
| Item | Location or default |
|---|---|
| Configuration file | /etc/apache2/conf.modules.d/510_pagespeed.conf |
| Module file (Apache 2.4) | /usr/lib64/apache2/modules/mod_pagespeed_ap24.so |
| Cache directory | /var/mod_pagespeed/cache/ |
| Default status | On for all domains (ModPagespeed on) |
| Excluded by default | cPanel subdomains |
The configuration file also lists commented-out options for the rewrite level, individual filters, and cache sizes. Most sites never need to change them.
Does mod_pagespeed Work with Cloudflare?
Sometimes it runs into trouble. Cloudflare and mod_pagespeed can both optimize or compress website content, so a domain that uses both may show display or loading problems after you install the module. If that happens, turn off the overlapping optimization features for that domain in your Cloudflare dashboard and test the site again. If the problem is still there, contact HostGator Support.