How to Purchase and Install SSL Certificates in Customer Portal
SSL Certificates help protect your website and users by encrypting communication between your server and visitors. When installed, your site will display a padlock icon in the browser address bar, signaling that it’s secure and trustworthy.
All HostGator Shared, WordPress, and eCommerce hosting plans include a free SSL certificate. If you need more advanced features, you can upgrade to Premium or Wildcard SSL, which are available directly through the HostGator Customer Portal.
This article discusses the following topics:
How to Purchase an SSL Certificate
There are several ways to order an SSL certificate in the Customer Portal: via the Websites tab, the Security tab, or the Marketplace.
Via the Websites tab
- Log in to your Customer Portal.
- Go to Websites from the left navigation menu.
- Click Manage Site next to the website you want to manage.
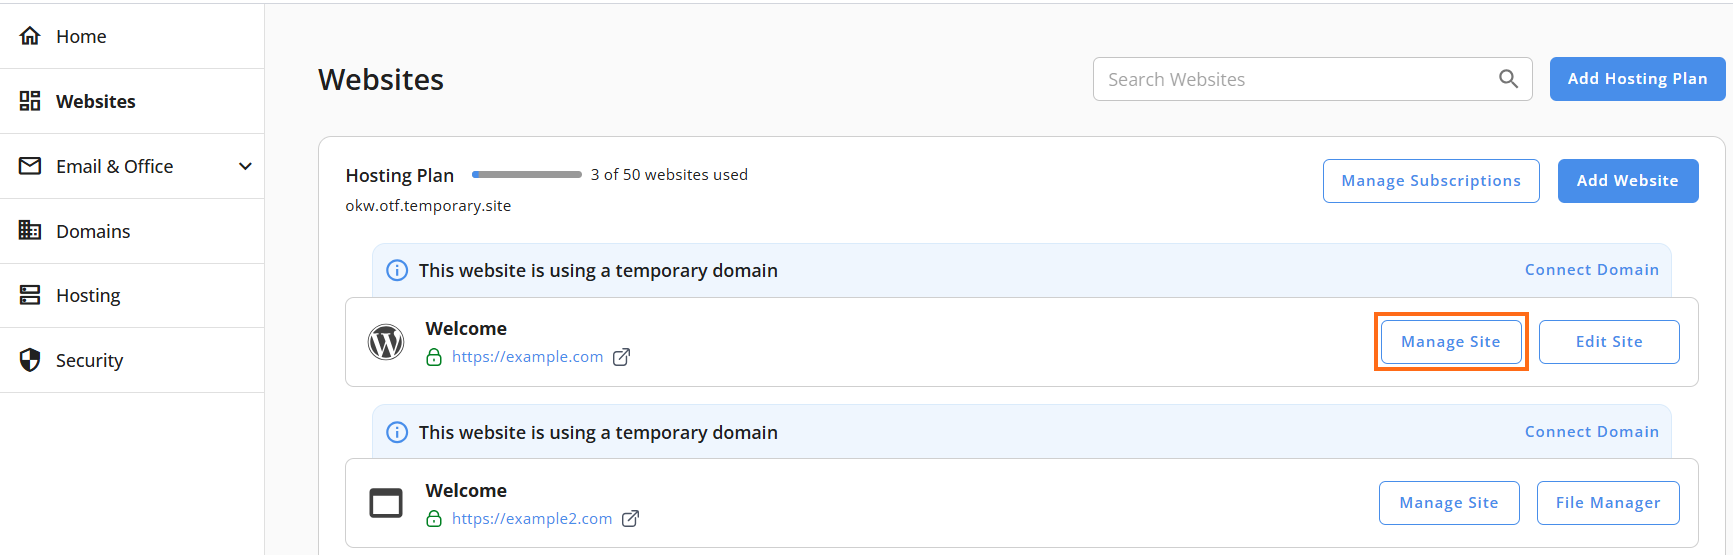
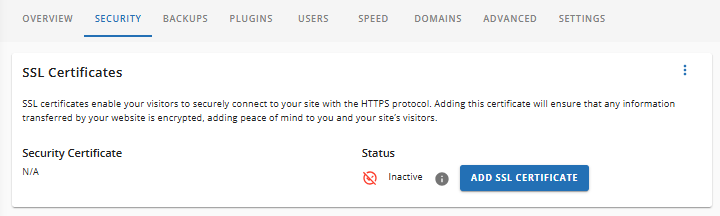
- On the website management page, click the Security tab.
- Click Upgrade under the SSL Certificates section to purchase an SSL certificate for your website.
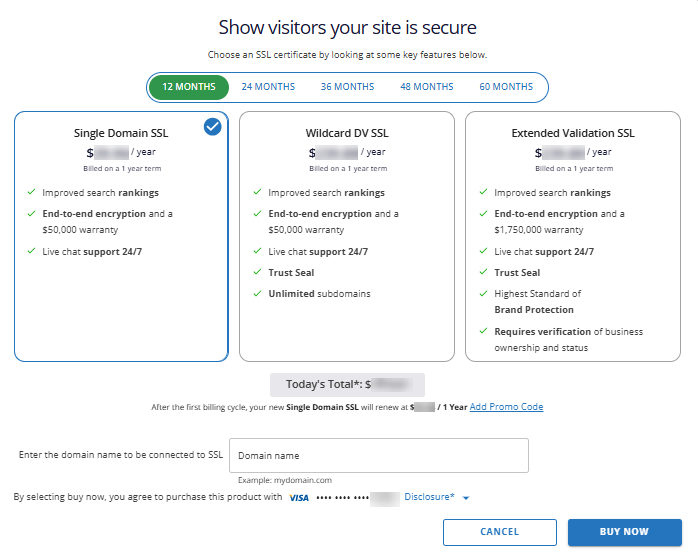
- Choose the desired SSL certificate plan and billing term.
- If you have a promo code, click Add Promo Code and enter the code before completing the purchase.
- Enter the domain name that will be secured by the SSL certificate in the Domain name field.
- Click Buy Now to complete the purchase.
Via the Security tab
- Log in to your Customer Portal.
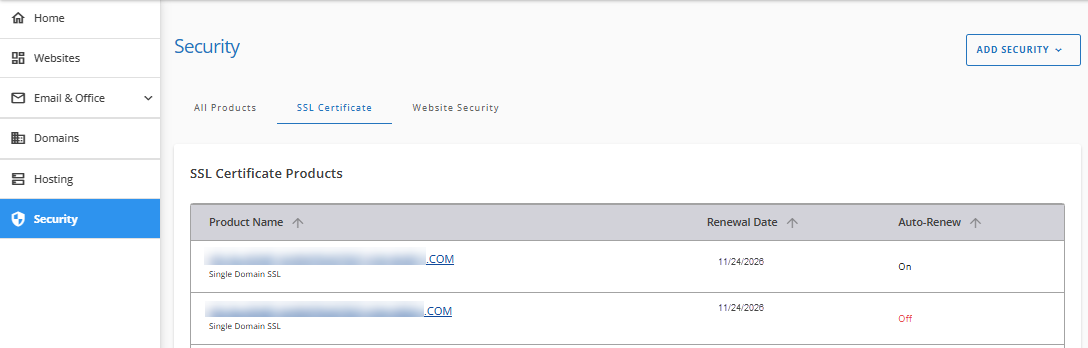
- Click Security on the left-hand menu.
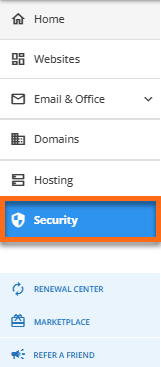
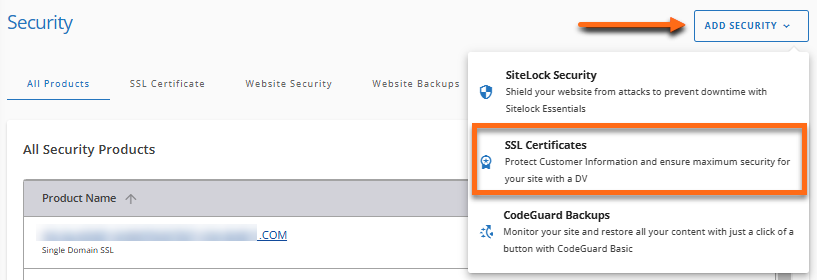
- You will see all security products under the All Products tab. Click on the Add Security dropdown menu in the top-right and select SSL Certificates from the list of options.
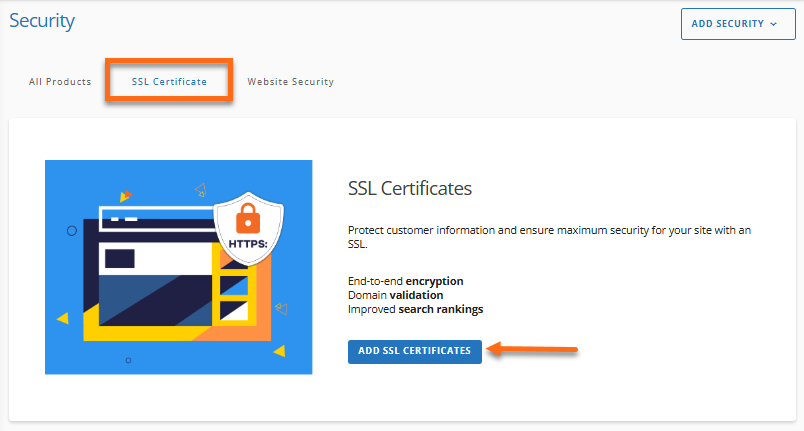
You can also click the SSL Certificate tab and click the Add SSL Certificates button.
- Select the SSL certificate plan and billing term you want to purchase.
- If applicable, click Add Promo Code and enter your promo code.
- Enter the domain name you want to secure in the Domain name field.
- Click Buy Now to proceed with the purchase.
Via the Marketplace
- Log in to your Customer Portal.
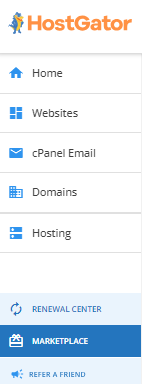
- Click Marketplace on the left-hand menu.
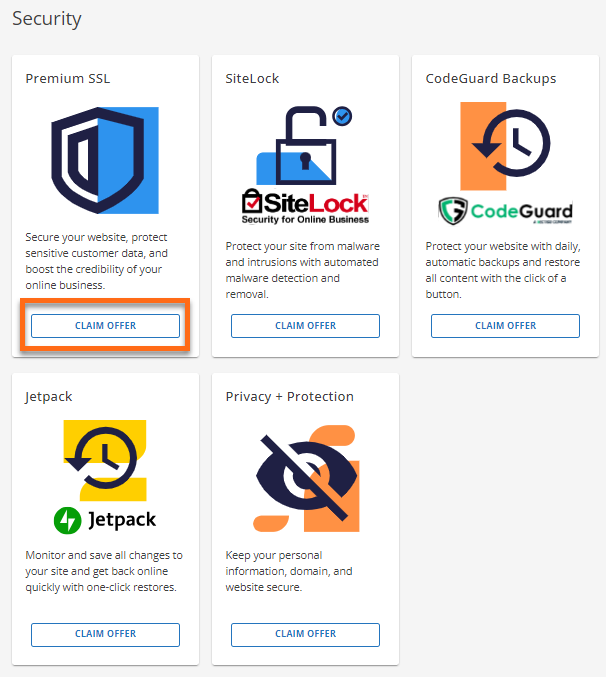
- Scroll to the Security section and click Claim Offer under the Premium SSL card.
- Choose your preferred SSL certificate plan and billing cycle.
- Apply a promo code, if available, by clicking Add Promo Code.
- Specify the domain name that will use the SSL certificate.
- Select Buy Now to continue with the order.
You should now see your SSL Certificate under the Security tab of your Customer Portal.
How to Configure an SSL Certificate (Post-Purchase)
SSL certificates are often installed automatically. If not, you can activate it manually by completing three simple steps.
If you are moving an SSL certificate from a third-party provider, you do not need to verify your domain. Please visit the following article for more information about installing third-party SSL certificates.
Step 1: Assign Domain
- Log in to your Customer Portal.
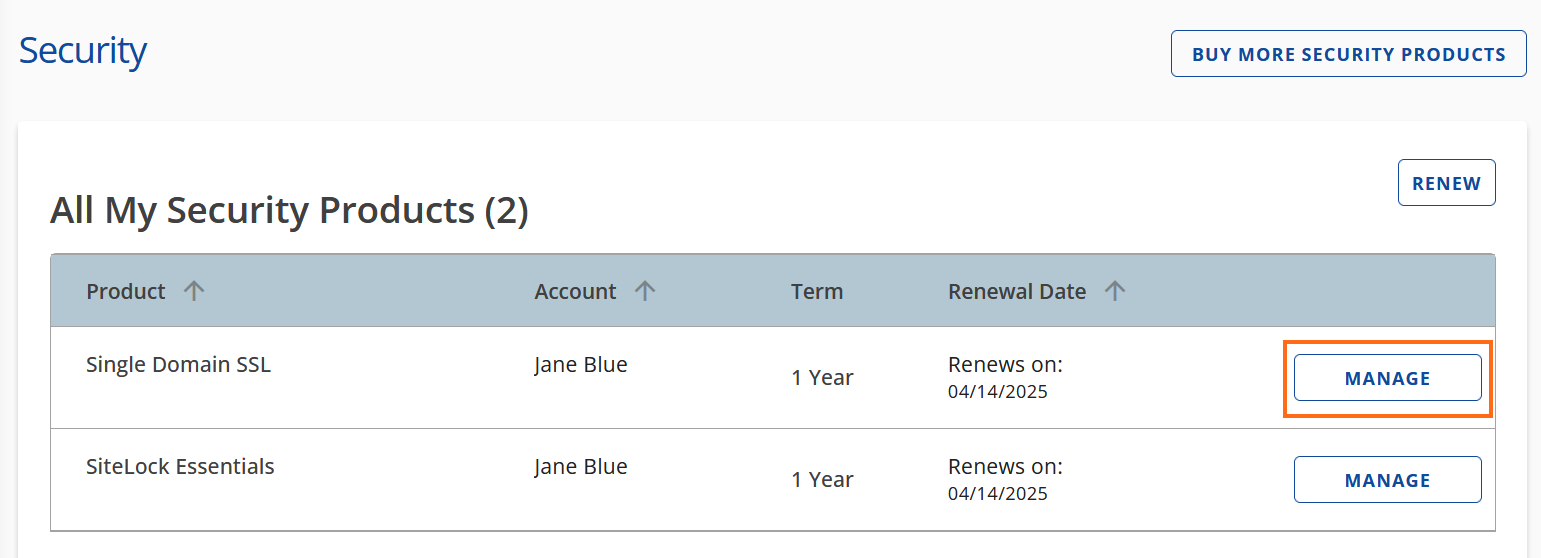
- Click Security on the left-hand menu.
- Find your SSL package and click Manage.
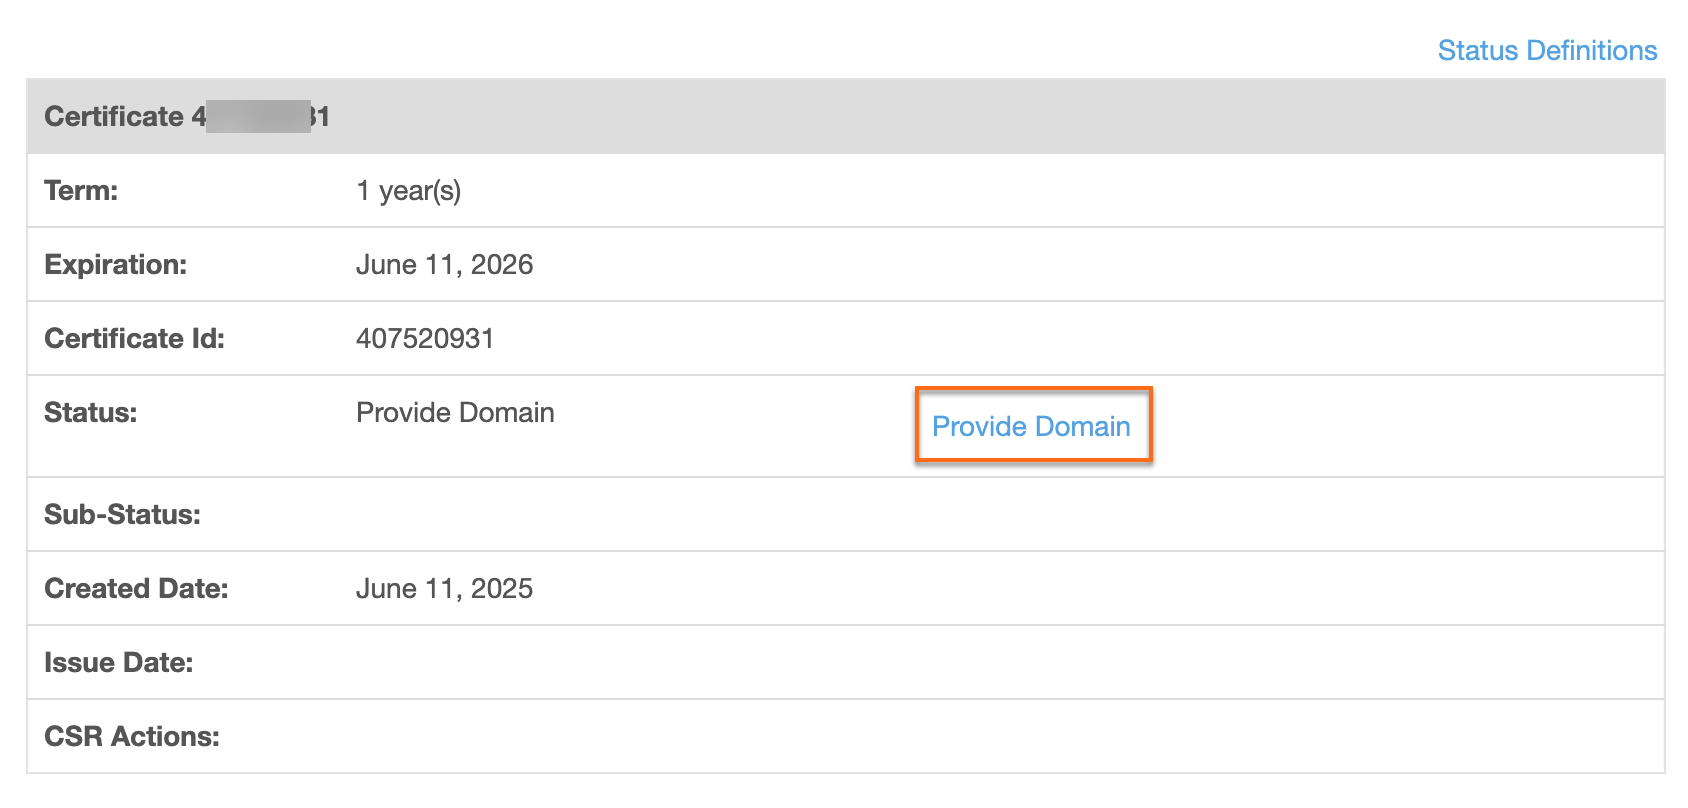
- In the SSL Control Panel, click Provide Domain.
- A pop-up will open; enter and confirm your domain name, then click Continue.
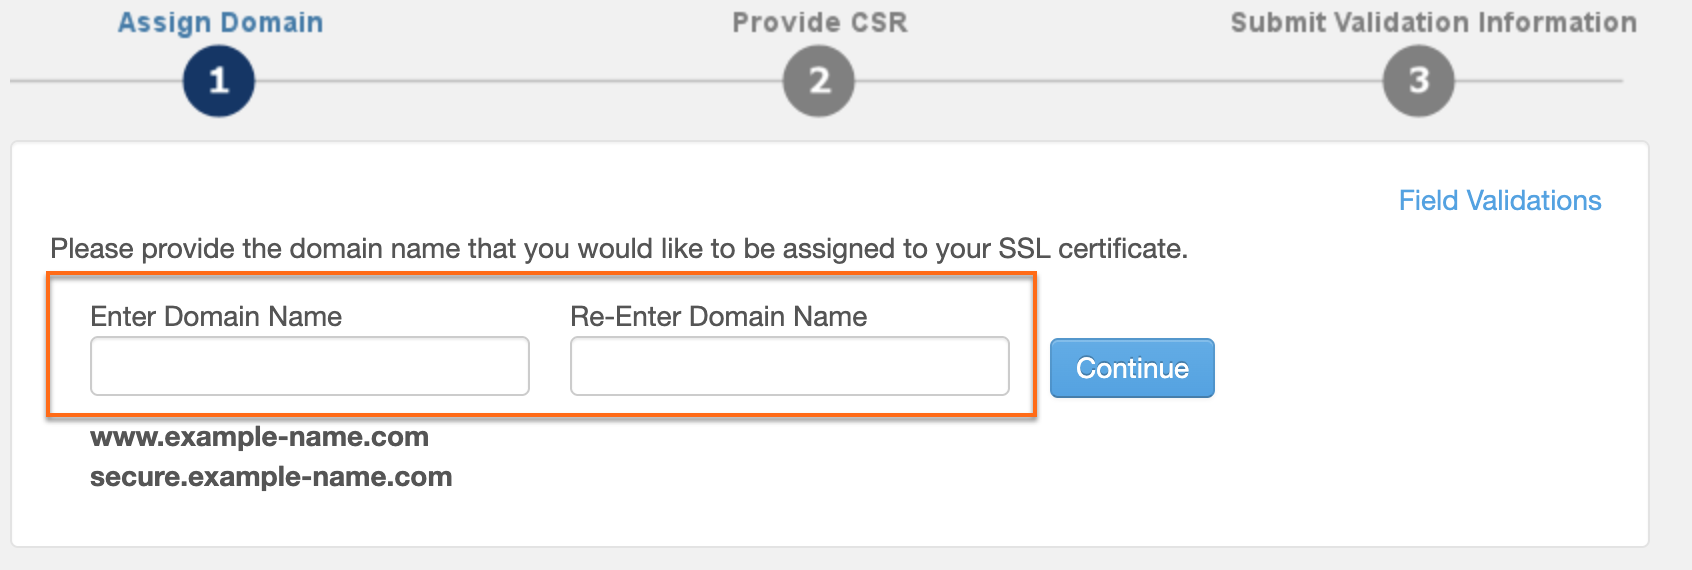
Note: Ensure that your SSL certificate is issued to the exact version of the domain or subdomain it will be assigned to (e.g.,example.comvswww.example.com). Remember that once the domain is assigned, it cannot be changed.
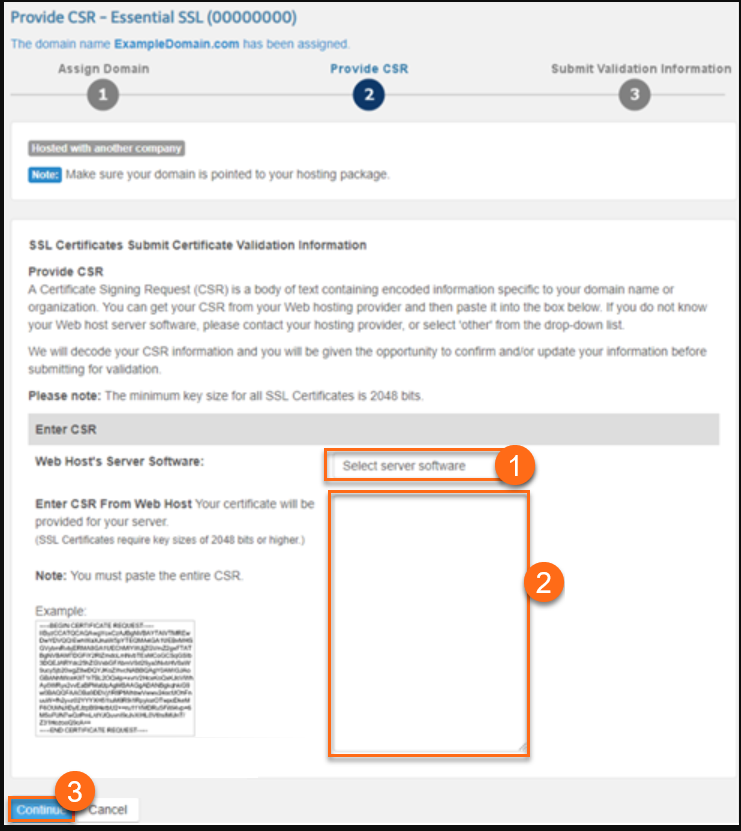
Step 2: Provide Certificate Signing Request (CSR)
- If HostGator hosts your website, a CSR is generated automatically.
- If a third-party host hosts your website, follow these steps:
- Choose your server type.
- Paste the CSR provided by your host into the Enter CSR From Web Host field.
- Click Continue.
Step 3: Submit Validation Information
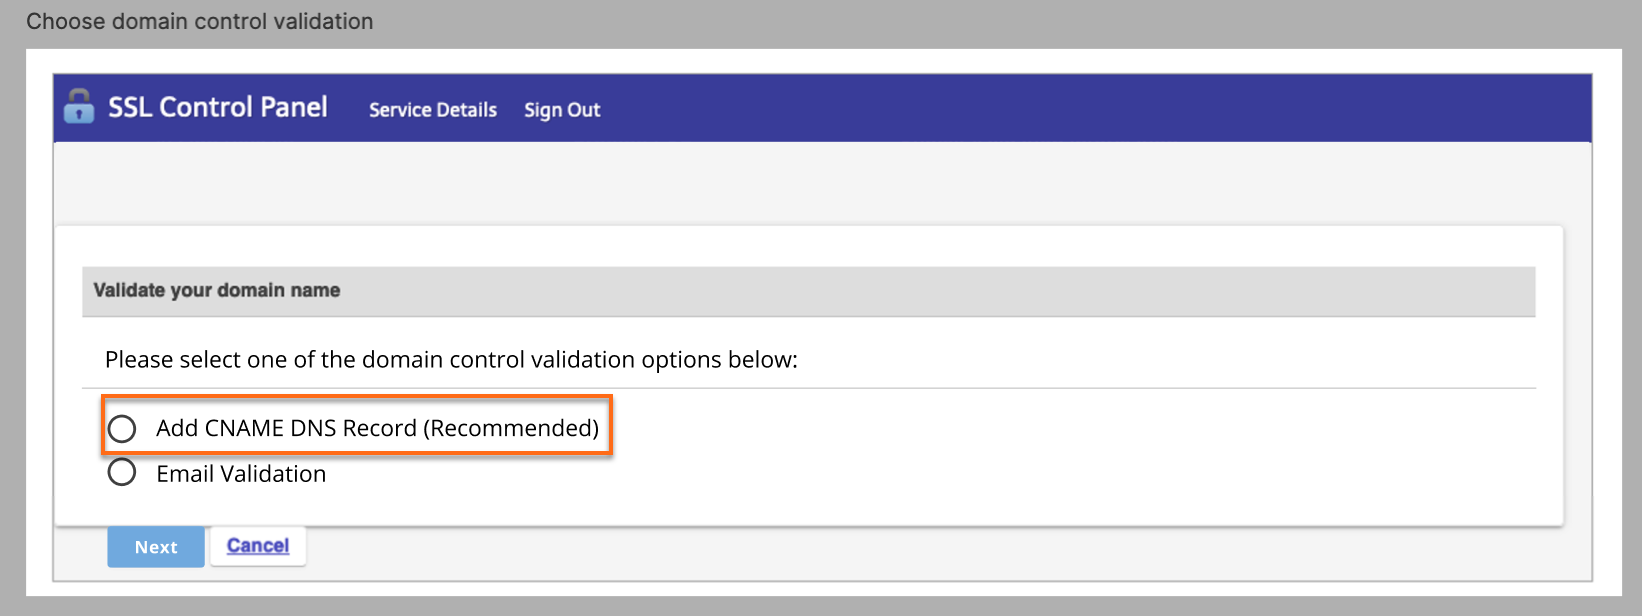
- Option 1: CNAME Verification (Recommended)
Add a CNAME DNS record to your domain's DNS.
Benefits:- More reliable than email
- Works with WHOIS privacy
- Preferred by HostGator and Certificate Authorities
Steps:- Choose Add CNAME DNS Records (Recommended) and click Next.
- Copy the provided CNAME Value and Hostname.
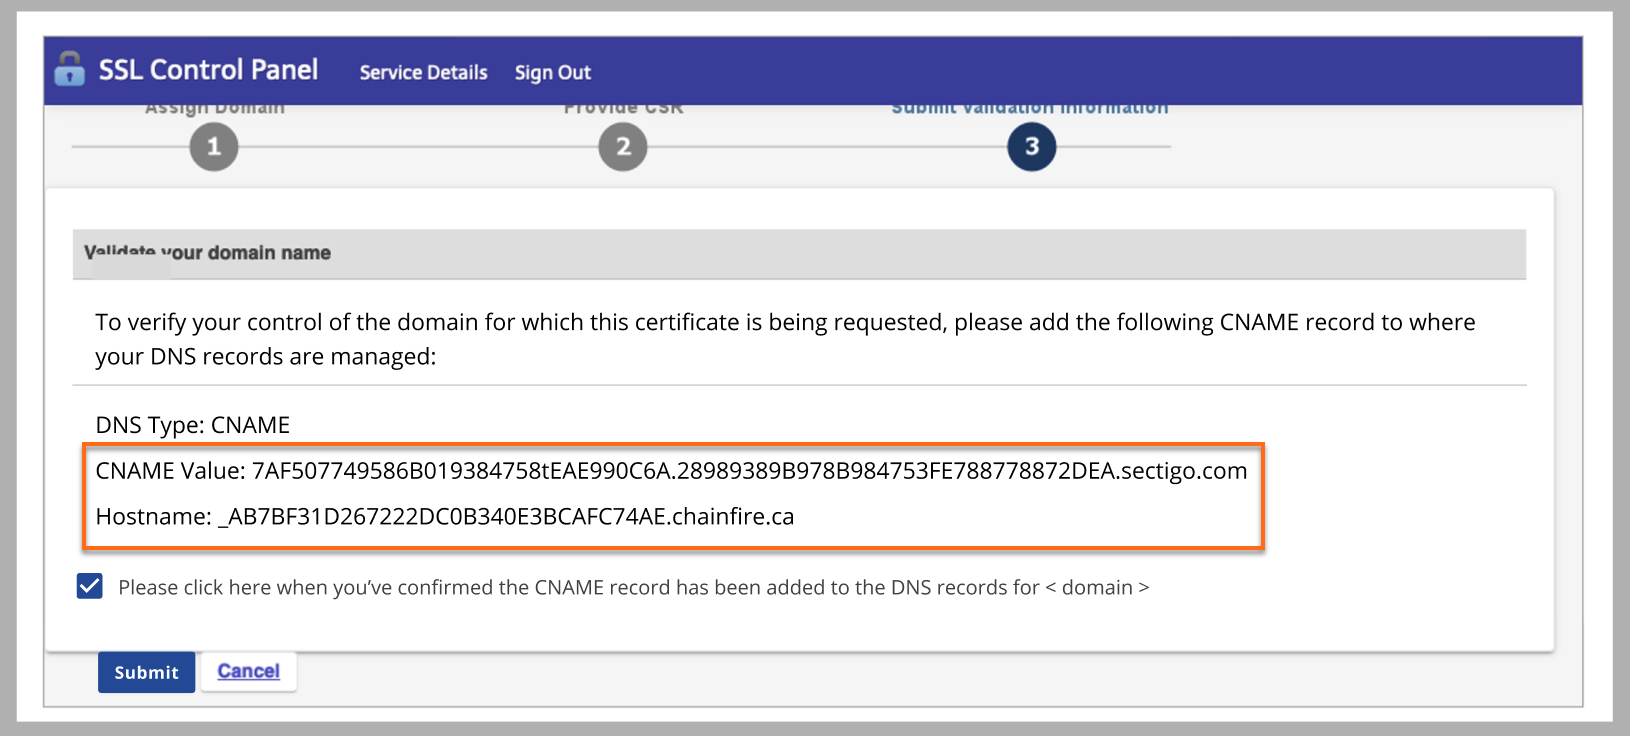
- Add the CNAME Record to your DNS.
- If your domain is hosted with HostGator, follow these steps:
- Go to the Domains section and navigate to the DNS tab.
- Click Add Record, then choose CNAME.
- Fill in the details:
Field Value Type CNAME Refers to Other Host Host Name (Paste the CNAME Value) Alias (Points to) ( Paste the Hostname — Must begin with an underscore _) TTL 2 Hours Important: Double-check for typos or extra spaces in the fields before saving.Note: To revalidate or reissue your SSL certificate, replace the old CNAME record with a new one. - Save the changes.
- If your domain is hosted outside HostGator, please get in touch with your DNS provider directly to update the CNAME records.
- If your domain is hosted with HostGator, follow these steps:
- Confirm the CNAME record has been added.
- Return to the SSL Control Panel.
- Check the box:
“Please click here when you've confirmed the CNAME record has been added to the DNS records for <domain>.”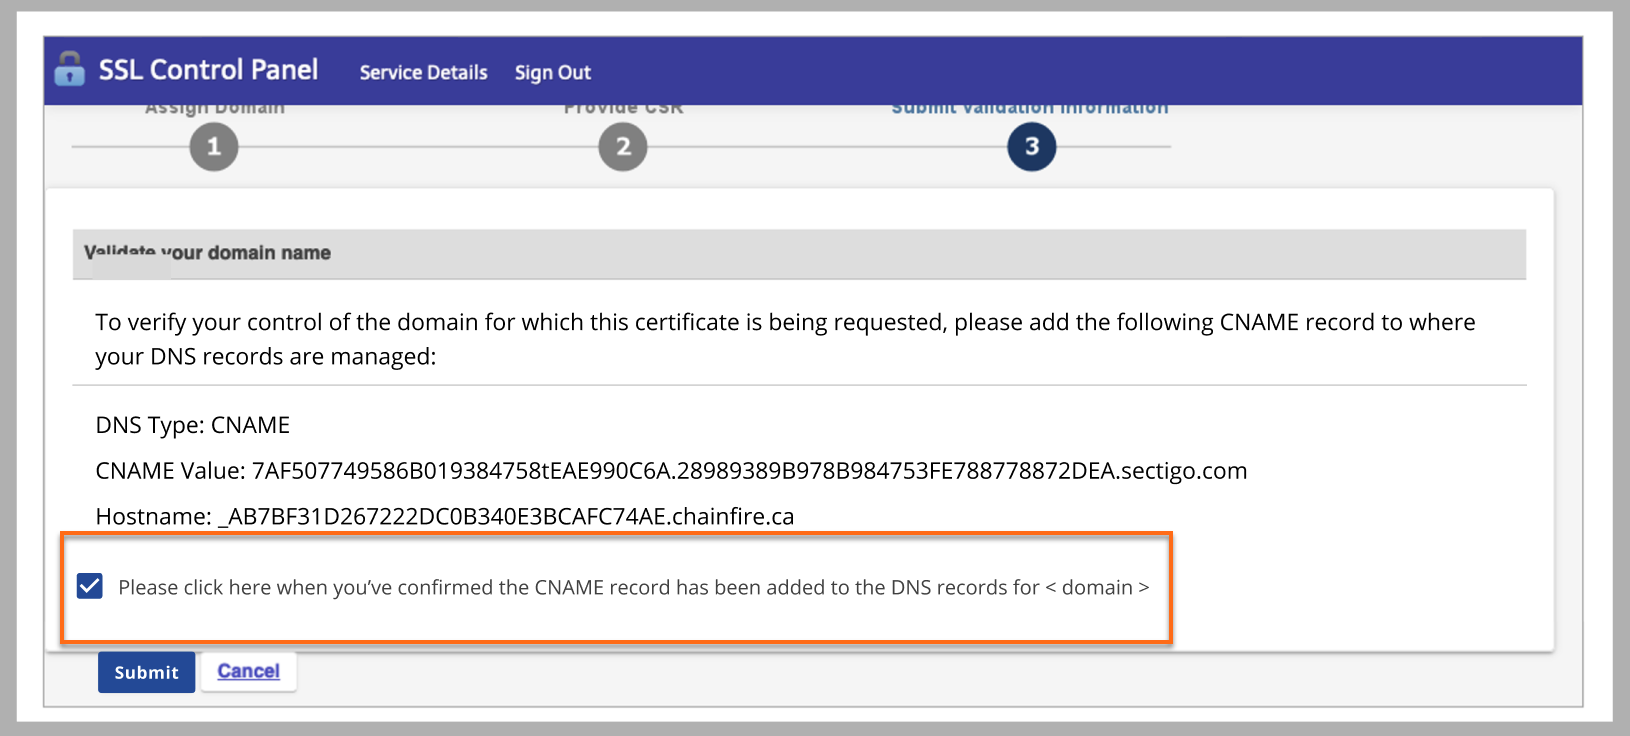
- Click Submit.
- Option 2: Email Verification (Limited availability)
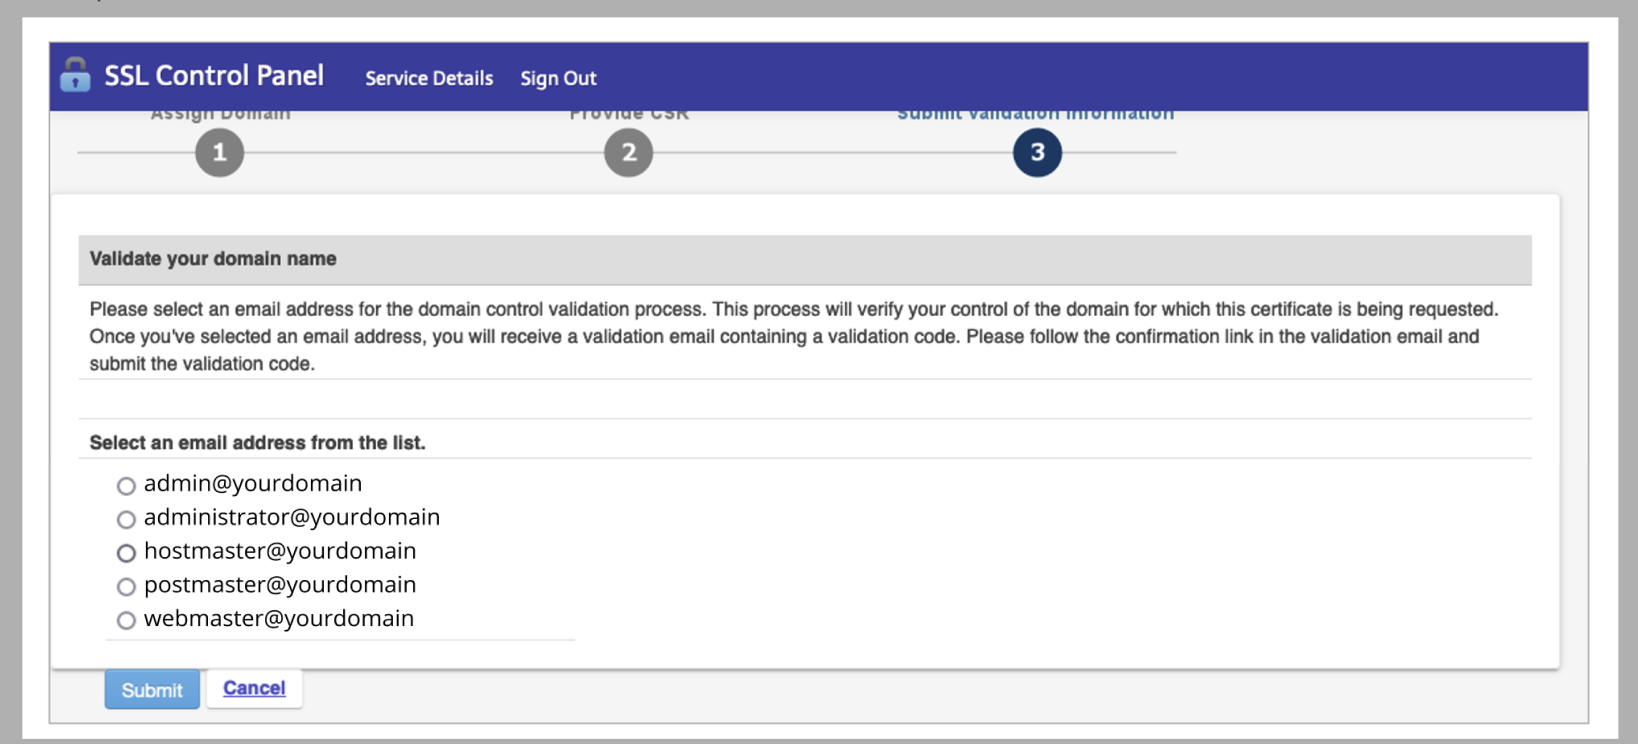
Only available for these admin addresses:
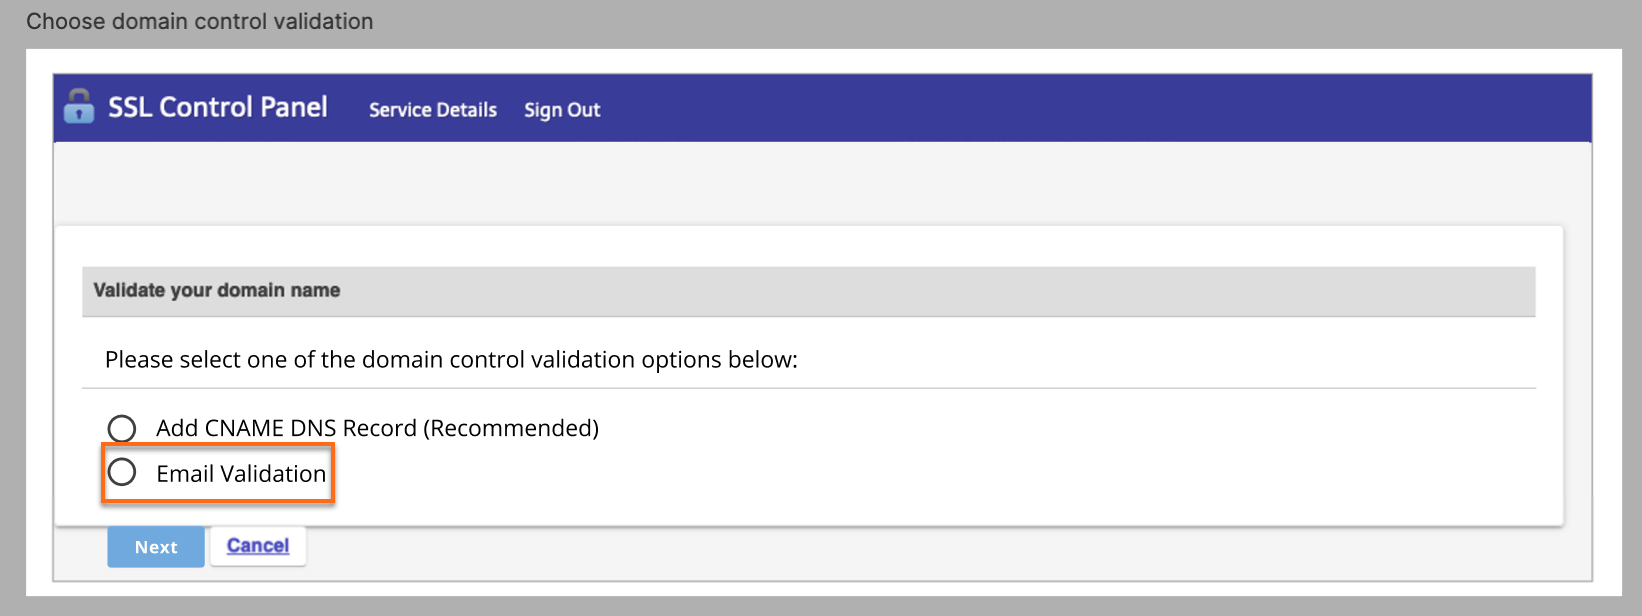
Steps:- Choose Email Validation and click Next.
- Select an eligible email address and click Submit.
- Open the email, click the confirmation link, and follow the preceding steps.
- Enter the validation code and complete the process.
Important: Email validation may fail if your domain uses domain privacy or if the specified email account does not exist. Ensure that the email address is valid and that domain privacy is disabled. - Choose Email Validation and click Next.
Related Articles
Not sure what you need? We have consolidated our SSL articles for you.